
1. To get a feel for what your information will look like, I recommend first going to Search Results and look at several trip descriptions.
Find a few examples of descriptions you like and identify the specific elements that make them stand out to you. Use these examples to pattern your descriptions after while using information from your website or an organization brochure. You can also see what an agency profile page looks like at https://missionguide.global/org.
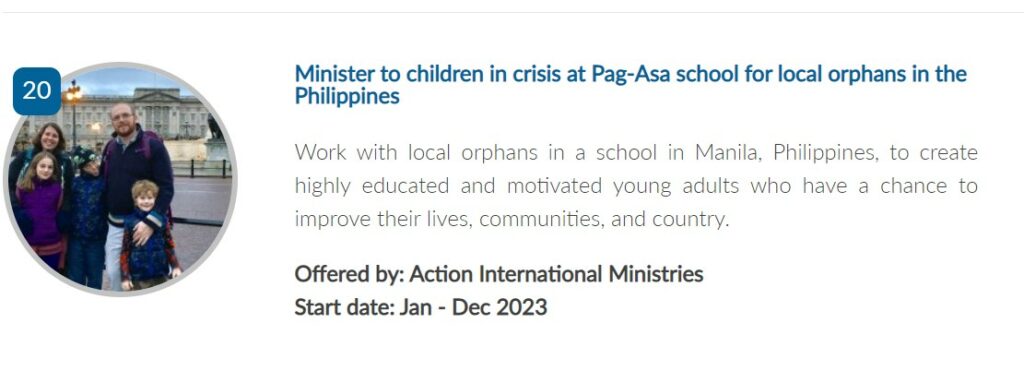
EXAMPLE:
2. Next, go to your Agency Control Panel (ACP), Agency Login, enter your username and password and then review or enter more information displayed about your agency in the Organization tab. The doctrinal statement as well as the mission or vision statement can be cut and pasted from your agency website. The information on the Organization page is what searchers see when they look at your profile.
On the side navigation menu, go through each tab to add or update information. Be sure and “Update” after each change before leaving tab to save it. (Bottom of page)
We will need to format and place your logo on your page, please email it as a jpeg or png attachment to [email protected].
3. Add your administrator/editors in the Contacts Tab
Begin by entering information on the people who will receive the inquiries about your opportunities. This information will be used by your organization to direct e-mails and phone calls specifically to people who request more information or wish to apply for your trips. Later, as you enter the details for your opportunities in the Trip Manager section you will need to select one of these contacts.
Basic and Trial accounts allow only one administrator, but multiple editors. Premium accounts can have multiple administrators with individual login privileges. Make sure the email addresses entered here are correct for the direct trip inquires you will receive from MissionGuide.global.
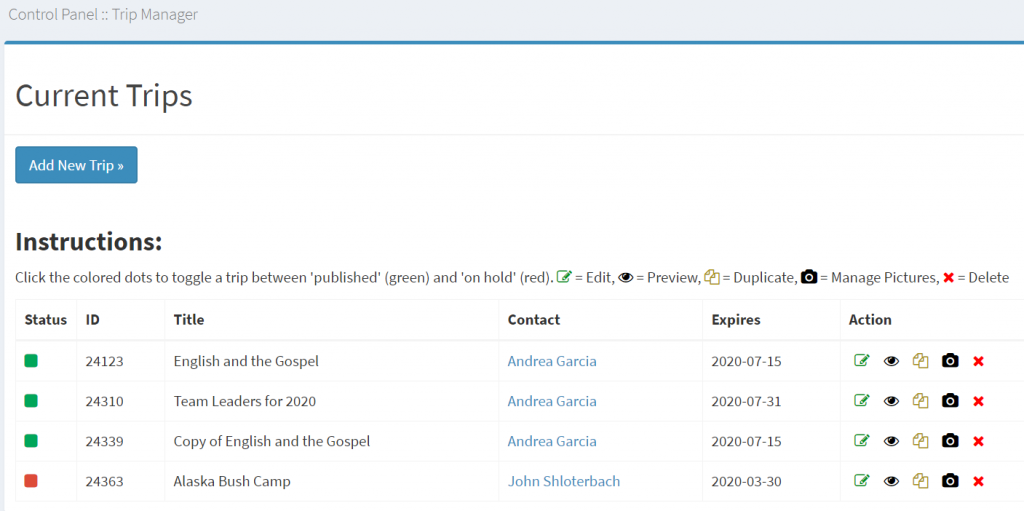
4. Go to the Trip Manager section to enter new opportunities
To enter information about a new opportunity, click on the blue “Add New Trip” button and fill out the form. You can enter as much or as little information as you would like.
To make the process of entering information go quickly and smoothly, we suggest creating a Word file with a 3 line (150 words) brief description of the trip followed by another more complete description (up to 600 words). By using a Word file, you can easily spell check and edit your information. This also helps save your work in case there is an error saving what you entered in the ACP. You may already have some information you can use on your web site or in your brochures which you can cut and paste into the opportunity information form. (Please be aware of form word limits and required fields with the [R] and [P])
Things to consider:
- The “Title of the Opportunity” field is what is displayed to inquirers, so word it to draw attention. The “Internal use Only Title” appears only in the Trip Manager section of the ACP and is never displayed with the trip information. This is for your use.
- First, write an attractive yet concise “Brief description” that shows on the search results. Also, while practicing searches, it is a good idea to do a couple searches using key words, like “orphanage”, “construction”, “teach” or “photography”, that fit your activities, to see how it works. You want your opportunities to show up on the key word searches as well!
- The second part of entering an opportunity is writing the “Full Description”, a more detailed, but catchy longer description. The full description should appeal to what the reader could expect to experience, and get involved in if he were to go on the opportunity being described. This is the place to both explain the culture and people group, and how one becomes part of the mission. To ensure that you get more direct inquires from searchers on ShortTermMissions.com, refrain from putting statements/links to go to your website. The idea is for them to use the “Inquiry” form from your trip description.
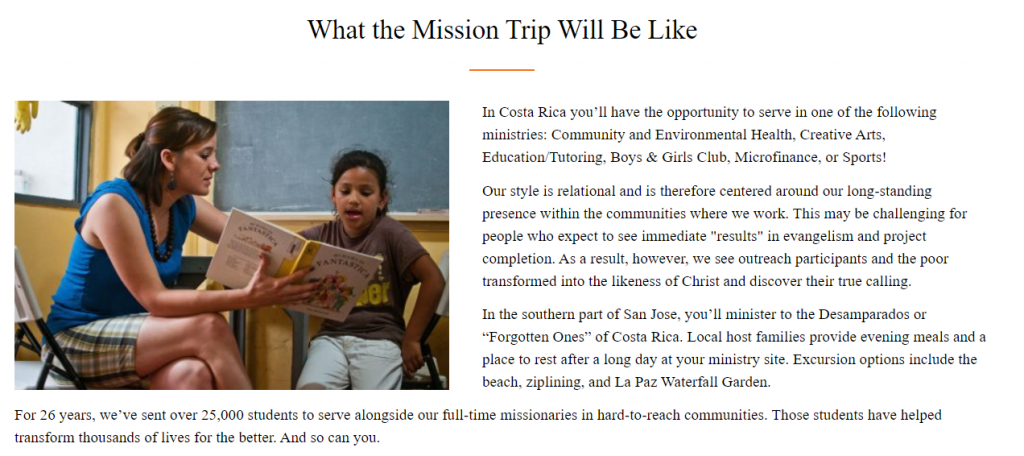
EXAMPLE:
- Choose the best Ministry Activities from our list of categories that fit your trips. You can choose up to 5. See Choosing Ministry Activities for options.
- Don’t forget to add pictures. You can add and associate 2 photos per each trip or upload photos to your gallery in the Picture Manager tab for using later. If you have no picture associated with a mission trip it will display in the search results page with a “No Image” icon. If trip has no picture a default map is added on the trip view page, but not on list view results of a search. You want your trips to be appealing in search lists so they look at your trip page. For tips/information on adding pictures and copyright info see Tips for Uploading Pictures and DMCA Policy/Photo credits, Adding Videos
- For more tips on entering trip details be sure to read, Helpful Tips When Entering Your Information, Agency Best Practices and other Agency Articles
5. Click the “Save Trip and Continue Editing” button at the bottom of the page to go to the next tab. Remember you don’t have to fill out the form all at once, you can always return to edit it. In that case, click “Save Trip and Return to Trip Manager” to exit and finish at a later time.
6. “Save and Preview” / See how it appears to the public.
When finished, click on the “Save and return to trip manager” button, then click on the icon “eye” next to the trip to see how your opportunity information will be displayed without leaving the ACP.
After entering the details on all your opportunities, we recommend searching at https://missionguide.global/ First, search by your agency name and then by each country or region to make sure they all come up as you expected and that all the information was recorded correctly. Almost always there are a couple details that don’t turn out as you expected! Second, try searching by other categories as well to see how yours come up. Then you can go back and change details, words or update any information needed.
IMPORTANT: Make sure after entering, updating or duplicating opportunities that you set trip as “Published” and not “on hold” so the public can see it. The easiest way to do this is in the “Trip Manager” area listing trips. If the status is green it is showing public, if red is it not. You can switch it right there by clicking the box or you can edit the trip and change it on the basic information tab, at the top under trip title. If you get an error message, edit your information to see if required fields contain information or if your dates have expired.
*Print or save this as a reference guide for you or others in your organization entering short-term mission opportunities.
Contact customer service if you have any questions or need assistance.
Email: [email protected] or leave a message at 479-310-5220.