
Here are some Helpful Tips to consider as you write up information for your trips.
 1. Include specific keywords in your descriptions and titles.
Be sure to include all of the keywords or phrases in your title and descriptions that would interest a person when they use the “Keyword Search” to find your opportunity. Don’t forget to include the name of the country, type of activity or if you are recruiting a group or individuals for the trip. Use words that you think people would use to search for your trips.
2. Use creative word descriptions to capture interest
People are drawn by action verbs and colorful adjectives, so be creative! Paint a picture with your words. This is especially true with the “Brief Description”. When a person makes a search they will get a page showing trip results with 10-20 “Brief Descriptions”. If you catch their eye in the first three seconds they will want to look at the full details of your trip!
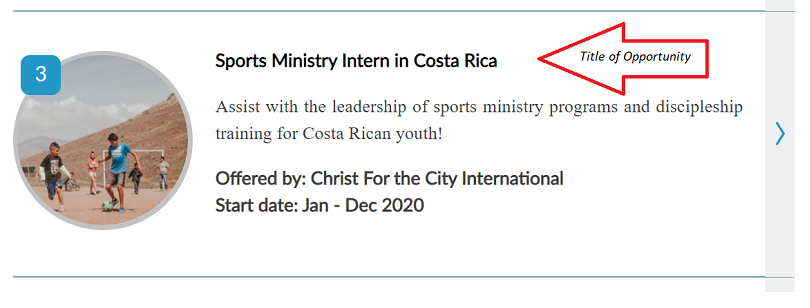
3. Make use of the two different titles
The “Title of the Opportunity” field is what is displayed to inquirers, so word it as to draw quick attention with specific details. It is the first thing they see. The “Internal use Only Title” appears only in the Trip Manager section of the ACP and is never displayed with the trip information. This is for your eyes only, in this title you can abbreviate words and use your mission acronyms so you can quickly identify and distinguish between your trips and find them quickly later in the ACP.
4. Select all of the regions that apply
If the opportunity is in Latin America, be sure to select “Latin America” and the specific area like “Central America”. That way your trip shows up whether they search generally for (Latin America) or more specifically for (Central America). The same holds true for Asia. If you offer trips in the USA and Canada, be sure and choose the state/province also to narrow down search results even more.
Each country is auto-mapped to a region. The regions corresponding to the countries that you select will automatically be added to your trip details.
In the “Activities/Location” tab you can also add the state if trip is in the US. We suggest you do this for better results.
5. Watch out for the scroll wheel!
If you have a scroll wheel on your mouse and you use it to move up and down the page, be careful that you are out of the drop down boxes before you roll it. You can do this by clicking on any blank space on the page. If you don’t, you may accidently change the selected field without realizing it.
6. Use the “Duplicate” feature to speed up entry
If you have several similar opportunities, enter the information for one basic trip, save it, and then click the “duplicate” icon to the right of the trip name on the Trip Manager tab. This creates a duplicate copy of the trip. Open the duplicate copy and modify the details or dates that are different for the new trip. Be careful not to make all duplicated trips look exactly alike, add some different keywords, pictures or word changes in the Brief Description to make each trip a bit unique.
7. Watch what you say
Concerning security and closed countries: Remember, anything posted on the internet can be read by anyone around the world. That means your opportunity descriptions could be read by government officials of the countries to which you are taking a group. Therefore, with some trips to sensitive areas, you will want to tell enough to interest the searcher, but not enough to close the door to your going to that country! A phrase such as: “develop relationships while learning about their culture and worldview” is more neutral than “do friendship evangelism”. With closed or restricted access countries it is often best to avoid using the following words: evangelism, missionary, evangelize, witness, missions, etc. You can also choose a “Region” if you can not reveal the exact country the trip is planned for.
8. Open another window
When in the ACP you can always preview to see how your trip looks publicly, without leaving. But if you want to do searches while working on entering your trips, open two windows in your browser. Use one to display the Account Control Panel, and the other one the website for searching with options to see how your opportunities are being displayed. You can do this by clicking on the “File” menu and selecting “New Window”.
9. Have someone else read it
After you are finished entering an opportunity, have someone else read it. Ask them what their initial impression was, and if they had questions that were unanswered. Remember, you can think your descriptions are the best, but a second set of eyes can help you see anything you missed. Also a good idea to do some searches using 3-4 criteria to see how your trips come up.
10. Roll over opportunities to the next year
In April, May and June up to 18% of the searches are for the summer of next year, and some for 2 years out. So, in the late spring and during summer, when you have passed your application cutoff dates and your trip “expires”, it is wise to quickly edit and republish the trip for next year. Enter an approximate start month selection and approximate funds needed range so as to keep the opportunity visible for next summer while you finish getting the details figured out.
If the opportunity will be a bit different next year, you can preface the present description with: “Description of the trip currently in progress. Next year will be similar.” Do this on at least one of your opportunities in order to keep your agency contact information visible to people browsing the site all year long.
Some people searching for opportunities a year in advance are newly elected student mission officers who are planning ahead for short-term mission trips for next summer, to be announced in Sept and Oct. If you want school groups, you need to have your info up all year even if it is general.
11. Check dates carefully
The “Trip Expiration Date” is when you want your trip listing to expire, this usually is your organization’s application deadline for that particular trip.
When the “Trip Expiration” date arrives, the website automatically takes that opportunity description off line, marks it with a yellow button in your Account Control Panel, adds the word “Expired” in front of the opportunity name and sends you an email stating its expiration. This keeps the information on our website current, while the email alerts you to the fact that the date has arrived so that you can extend it by adding new dates if you so wish. Expired trips are stored in your ACP for later use or you can delete them.
If you get an error message, “date of the opportunity selected occurs in the past” check the date you entered. If you receive this message, it usually means the date selected in the “Trip Expiration:” box is a past date. That is the date upon which the opportunity will cease to be displayed on the website and will go on “hold” in your Account Control Panel.
12. Specify important information
Besides selecting categories for group or individual participants, state in your full trip descriptions or other areas whether you only take “pre-formed groups” such as groups from church, school, etc or you place individuals in groups for your trips. This is an area of confusion for inquirers at times.
Add in your trip information also if you only take applicants from the United States or Canada or if you do allow participants from ministry country and the requirements needed.
13. Choosing affiliation or giving recommendations
- When entering your organization information to choose an affiliation that is displayed on your page, your organization’s name must appear on the member lists below in order to check these affiliation boxes. If your organization is in the application process, you can check the box later, once approved. Affiliation badges are added by MissionGuide staff after verifying membership. These badges give accountability to recognized active members.
ECFA: ECFA Members
MissionExcellence: MissionExcellence Member Directory
To find out more about membership, discounts, & recognition available for MisisonExcellence members see MissionExcellence Membership options
- Including a brief quote, recommendation or review from a recent trip participant can be a great feature to add on a trip description or your organization profile page.
14. Ask us questions
We are more than happy to answer your questions and help resolve any problems you may encounter. We can even set up a time to walk through the ACP or discuss tips for writing up your trips. Just email us at [email protected].
Compiled by MissionGuide.global Staff